I’m a sloucher with terrible posture, and I would like to keep working in my sedentary profession of a programmer for quite a while. Current research suggests that sitting all day isn’t good for you (nytimes.com). Standing all day isn’t ideal either. I’m also a passionate DIYer. So I set out and built myself a standing and sitting desk, combining the best of both worlds.
Disclaimer: I’m not studied in ergonomics, and just documenting a setup which has worked for me for about half a year now.
In essence, a standing desk is nothing more than a few stacks of books and boxes on your regular desk. There’s IKEA hacks which get you a workable solution for a couple of dollars. But they usually lock you into your choice: Standing all day. I’m using a laptop with wireless keyboard and trackpad, so wanted a setup I can easily convert into sitting position.
First of all, the desk wasn’t cheap or easy. Its beautiful, solid beech, took a day to plan, two days to cut and assemble, and two days to sand and paint. So this is something for the years to come. And its still about half the price of those size adjustable ergonomic desks.
Google Sketchup is surprisingly effective for planning furniture in 3D. Once you get over the initial freakout of not being able to work primarily based on numerical measurements, that is. It allowed me to plan the desk design and parts, but also position a virtual dummy, and fill it with to-scale models of different equipment from their 3d warehouse. I made sure that it fits both my current 15inch Macbook Pro, but also a (theoretical) 27inch iMac with an external monitor at correct eye height. You can download the model if you want to poke around a bit.
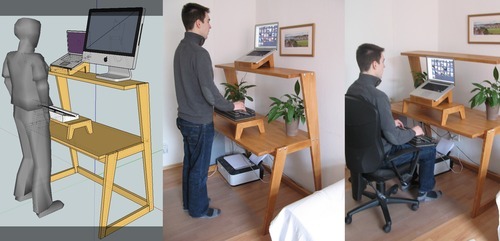
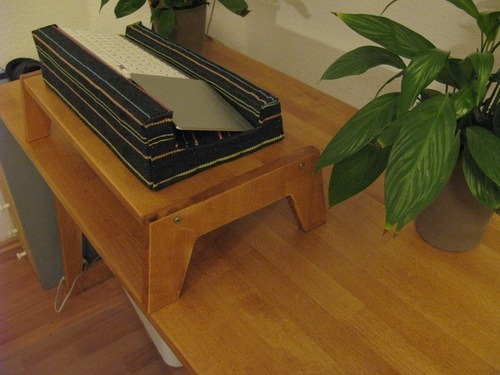
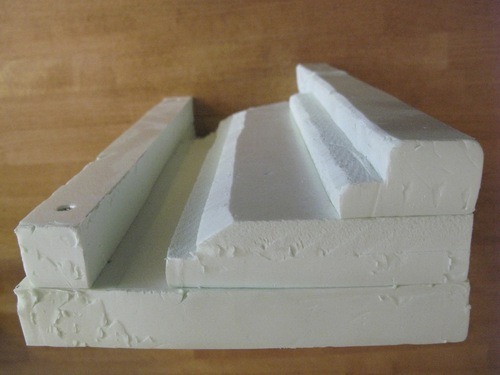
So what’s special about my desk? The fact that you can take the laptop in its holder from a standing position, and place it into a sitting position, all while retaining a correct eye height. This mainly works because both keyboard and trackpad are placed in a custom-built polystyrene holder (my instructions), which sits on my lap in sitting position, freeing up the desk for the stacked-holder combo. It also means that you’re not locked in to a certain height, since the small pedestals are much easier to replace than a solid desk plate and legs. Granted, a moveable setup doesn’t work so well if you have an external monitor or iMac. But I found that I’m perfectly happy with the screen size of a (high res) laptop. Single tasking and a good window management app like SizeUp get you a long way.
A note on posture: I found a correct line of sight to be most important: With a straight look you should meet the upper third of your screen. More than a few centimetres up or down from that will give you neck pain. Many standup desks are built to operate the keyboard with your underarms at a 90 degree angle. I’ve found that less comfortable than the downwards facing angle, but that only really works if you also angle your keyboard as shown above.
Should you go off and build a fancy desk right away? Probably not. Try if working standing fits you. Get to a comfortable height, stacking more books, taking away space under your keyboard, etc. Once you’ve got it carved out of wood, any (good looking) tweaks will get more complicated.
Apart from the “hardware”, what has really helped me was a little application forcing me into regular breaks. As a Mac user, AntiRSI is simple and effective. Relaxing your eyes and stretching helps a lot, but even just moving around works wonders (my plants are always perfectly watered!).
It’s probably too early for a recommendation, after half a year of usage (read this guy’s real-life experience report). I’m averaging about four hours standing per day, so its going well.

Lastly, I’d like to thank my amazing dad for making the desk possible (I neither possess the tools nor the skill to pull this off alone). And to my multi-talented wife for her encouraging feedback and sowing the keyboard holder.